
How to Choose a Stationary Bike: A Buyer’s Guide for Home Gyms
How to Choose a Stationary Bike: A Buyer’s Guide for Home Gyms
You have decided to invest in a home cardio gym. The space is planned, the budget is set, and you know a stationary bike is the right centerpiece for your fitness routine. Now you face a wall of options. Models range from a few hundred dollars to several thousand. Features promise everything from virtual racing to AI-powered coaching. This guide cuts through the noise. It provides a clear, step-by-step framework to select the perfect stationary bike for your specific body, goals, and home. The right choice will become a trusted fixture in your daily life. The wrong one becomes a very expensive clothes rack.
Choosing a stationary bike requires matching a machine’s design and features to your primary fitness objectives, physical dimensions, available space, and financial parameters. You must first identify your core use case: high-intensity interval training, endurance riding, physical rehabilitation, or general fitness. This decision directly informs the type of bike you need—upright, recumbent, or indoor cycle. Next, evaluate critical fit adjustments like seat and handlebar range to ensure comfort and safety. Finally, assess resistance systems, console data, and durability to find a model that delivers long-term value and keeps you consistently engaged. For a broader view on planning your entire workout space, refer to our strategic Home Cardio Gym Setup: Budget, Space, and Equipment Planning Guide.
Define Your Primary Fitness Objective
The first and most critical step is not looking at bikes. It is looking inward. A bike optimized for a competitive cyclist is a poor fit for someone rehabilitating a knee injury. Clearly defining your “why” narrows the field instantly and guides every subsequent decision.
For High-Intensity Interval Training (HIIT) and Performance Cycling: If your goal is to burn maximum calories in minimal time or to simulate road cycling, an indoor cycle (often called a spin bike) is the default choice. These bikes feature a heavy, fixed flywheel (18-48 lbs) and use friction or magnetic resistance to create intense, responsive load. The riding posture is aggressive, leaning forward over drop-style handlebars. This design supports out-of-the-saddle sprints and rapid resistance changes, which are core to HIIT protocols. The direct connection between pedal effort and flywheel momentum provides a realistic road feel. If you are new to this intense format, structured programs like those in our HIIT Workouts for Beginners: A Safe 4-Week Starter Plan can help you start safely.
For Endurance, Steady-State Cardio, and Joint-Friendly Exercise: For longer, moderate-paced sessions aimed at improving cardiovascular health without high impact, an upright or recumbent bike is often superior. Upright bikes mimic a traditional bicycle posture but with a more relaxed frame. Recumbent bikes feature a bucket seat with a backrest and pedals positioned in front of the body. This design removes all pressure from the wrists, neck, and lower back, making it ideal for users with arthritis, back issues, or those seeking maximum comfort for extended reading or watching television during workouts.
For Rehabilitation and Low-Impact Mobility: Recumbent bikes are the undisputed champion for rehabilitation. The supported seated position minimizes strain on the skeletal system while allowing full range of motion for the hips and knees. Many physical therapists recommend them for post-operative recovery. Some upright bikes also serve this purpose, but the recumbent’s ergonomic benefits are typically more comprehensive for therapeutic use.
For General Fitness and Family Use: If the bike will serve multiple household members with varying goals, a versatile upright bike or a basic indoor cycle with wide adjustability is key. Look for models with easy-to-use resistance controls, intuitive consoles, and a wide weight capacity range. The priority here is accessibility and durability over specialized performance features.
Understand the Three Core Bike Types
Once you know your goal, you can evaluate the three fundamental stationary bike designs. Each creates a distinct riding experience.
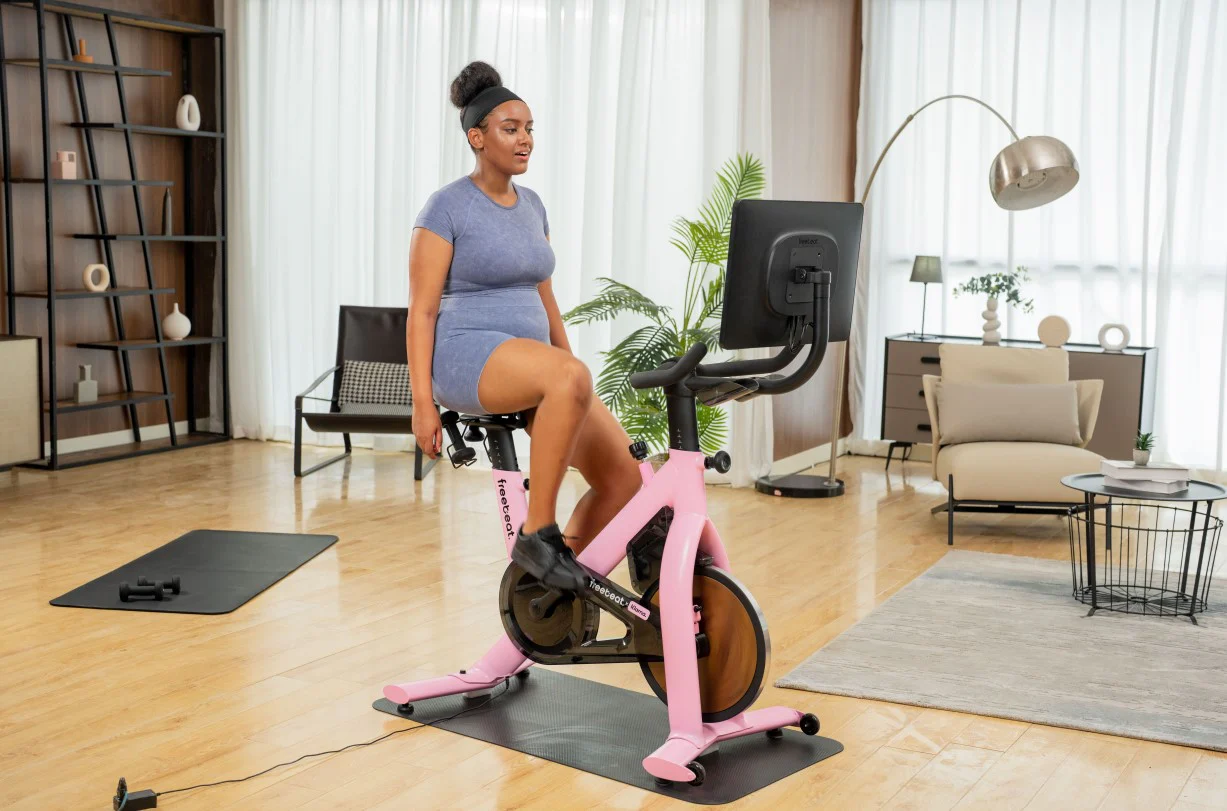
Indoor Cycles (Spin Bikes): Built for intensity and mimicry of outdoor cycling. The defining trait is a heavy flywheel connected directly to the pedals via a chain or belt. This creates a realistic “road feel” and momentum. Resistance is adjusted via a knob that controls a brake pad (friction) or magnet proximity (magnetic). The handlebars are multi-grip, allowing for hand positions for climbing, sprinting, and seated riding. The seat is typically a narrow, hard bicycle saddle. These bikes encourage—and withstand—vigorous standing sprints and jumps. They are the tool of choice for studio-style classes and serious cyclists.
Upright Bikes: The most common home gym silhouette. They resemble a standard bicycle fixed in place, with a smaller flywheel and a more compact frame. Resistance is almost always magnetically controlled via electronic console commands. The riding position is more vertical than an indoor cycle, with handlebars positioned for comfort rather than aerodynamics. Most feature wider, more padded seats. They are excellent for steady-state cardio, are generally quieter than spin bikes, and often include pre-programmed workouts. They are not designed for the aggressive, out-of-the-saddle riding of a spin class.
Recumbent Bikes: Characterized by a laid-back bucket seat with a full backrest and pedals mounted in front of the body. This design distributes body weight over a larger area, eliminating pressure points on the sit bones, hands, and lower back. Entry and exit are easier, making them superb for older adults or those with balance concerns. The biomechanics place less stress on the knees. The trade-off is a less intense cardiovascular workout for most users, as the reclined position does not engage the core and upper body to the same degree. They are the most comfortable option for long-duration, low-intensity sessions.
| Feature | Indoor Cycle (Spin Bike) | Upright Bike | Recumbent Bike |
|---|---|---|---|
| Best For | HIIT, performance, cycling simulation | General fitness, steady-state cardio | Rehabilitation, joint comfort, long sessions |
| Riding Posture | Aggressive, forward lean | Vertical, relaxed | Reclined, fully supported |
| Impact Level | Low, but high muscular intensity | Very Low | Minimal |
| Core Engagement | High | Moderate | Low |
| Ease of Entry/Exit | Moderate (requires mounting over rear wheel) | Easy | Very Easy |
| Typical Space Footprint | Compact, but tall | Compact | Longer length required |
Evaluate Critical Fit and Adjustability
A bike that does not fit your body will cause discomfort and lead to abandonment. Do not assume a one-size-fits-all approach. Key adjustments are non-negotiable.
Seat Adjustability: The seat must adjust both vertically (height) and horizontally (fore/aft). Proper height is achieved when your leg has a slight bend (about 25-30 degrees) at the knee at the bottom of the pedal stroke. Horizontal adjustment ensures your knee is directly over the pedal spindle when the pedal is forward. Many inexpensive bikes only offer height adjustment, which can force a compromised riding position.
Handlebar Adjustability: Handlebars should adjust vertically and, ideally, horizontally. You should be able to reach them with a relaxed shoulder posture and a slight bend in your elbows. On an indoor cycle, this allows you to switch between a comfortable upright position and a more aerodynamic grip. Lack of handlebar adjustment is a primary cause of neck, shoulder, and wrist pain.
Pedal and Crank System: Examine the pedal type. Basic bikes come with flat, toe-cage pedals suitable for athletic shoes. Indoor cycles often feature dual-sided pedals: one side for toe cages, the other with a locking mechanism (like SPD or LOOK) for cycling cleats. Cleats provide a more secure, efficient connection but require special shoes. The crank arm length affects pedal stroke mechanics; most home bikes use a standard length, but it is a spec to note for very tall or short riders.
User Weight Capacity: Always check the manufacturer’s maximum user weight rating. This is a structural integrity limit. Choosing a bike rated at or near your weight risks premature wear, instability, and potential failure. A good rule is to select a bike with a weight capacity at least 50 pounds greater than the heaviest user. High-quality models often rate for 300-400 lbs.
Analyze Resistance and Drive Systems
The mechanism that creates pedaling resistance determines the feel, noise, maintenance needs, and longevity of your bike.
Magnetic Resistance: The modern standard for upright and recumbent bikes and many mid-to-high-end indoor cycles. A magnet is positioned near the flywheel; moving it closer increases resistance without physical contact. Benefits are profound: it is virtually silent, requires no replacement parts due to wear, and allows for precise, incremental adjustment. Electronically controlled magnetic resistance enables automatic changes via pre-set programs. The feel is smooth but can lack the raw, road-like feedback of a friction system.
Friction Resistance: Traditional on many classic spin bikes. A felt or leather brake pad presses directly against the flywheel. The physical contact creates a distinctive “road feel” and audible hum. It allows for extremely quick, granular resistance changes with a simple turn of a knob. The downside is that the brake pad wears down over time (typically 1-2 years with heavy use) and must be replaced. It can also generate a slight burning smell during intense use. Purists often prefer this tactile connection.
Flywheel Weight: Heavier is not always better, but it matters. A heavier flywheel (over 30 lbs) creates more inertia, resulting in a smoother, more consistent pedal stroke with greater momentum. This is crucial for simulating the feel of a real bicycle and is preferred for spin workouts. Lighter flywheels (under 20 lbs) are common on budget upright bikes; the pedal stroke can feel choppier, especially at low cadences. For general fitness, a mid-weight flywheel is adequate. For performance, prioritize a heavier one.
Drive Mechanism: This connects the pedals to the flywheel. A chain drive (like a bicycle) is durable, provides an authentic feel, but requires occasional lubrication and is noisier. A belt drive (typically a polyurethane belt) is quieter, cleaner (no lubrication), and requires almost no maintenance, but can have a slightly dampened feel. Most magnetic resistance bikes use a belt drive for its user-friendly qualities.
Assess the Console, Data, and Connectivity
The console is your interface for tracking progress and staying engaged. Needs vary from basic to immersive.
Essential Metrics: At minimum, a console should display time, speed, distance, calories burned, and current resistance level. Heart rate monitoring is a valuable next step, either via handlebar grip sensors or a wireless chest strap compatibility (ANT+ and/or Bluetooth). Cadence (RPM) is a critical metric for structured training, telling you how fast you are pedaling.
Pre-Programmed Workouts: Built-in workout profiles (like hill climbs, intervals, or fat-burn programs) automatically adjust resistance over time. This adds variety without requiring you to manually turn a knob. The number and sophistication of these programs scale with price.
Interactive Memberships and Connectivity: Many modern bikes offer large touchscreens that stream live and on-demand classes (e.g., Peloton, iFIT, JRNY). This can be a powerful motivator but adds a significant recurring monthly cost ($30-$50). Ensure the subscription content aligns with your goals. Alternatively, a bike with basic Bluetooth connectivity can transmit your data to third-party apps like Zwift, Strava, or Apple Fitness+ on your own tablet, offering flexibility. For a deeper analysis of how different machines support varied training styles, our Cardio Equipment Guide: Choosing the Best Machines for Home & Gym provides a broader comparison.
Screen vs. No Screen: Decide if you want an all-in-one smart bike with an integrated screen or a “bring-your-own-device” (BYOD) model. Integrated screens are convenient but lock you into a specific ecosystem and represent a large portion of the bike’s cost. BYOD bikes have a simple console or none at all; you use your own tablet or TV. This is often a more cost-effective and flexible long-term strategy.
Prioritize Build Quality, Stability, and Warranty
A stationary bike is a long-term investment subjected to constant, repetitive force. Construction quality determines its lifespan and safety.
Frame Construction: Look for a frame made of heavy-gauge steel, not lightweight aluminum or plastic. The bike should feel absolutely solid when you stand on the pedals or push on the handlebars—no wobbling, flexing, or creaking. A wider stance on the stabilizing bars at the base adds significant stability. The finish should be a durable powder-coat, not cheap paint.
Weight of the Bike Itself: The bike’s own weight is a good proxy for stability. A high-quality indoor cycle will weigh over 100 lbs. A flimsy department store model may weigh 60 lbs. Heavier bikes absorb vibration better and stay planted during vigorous use.
Warranty as a Quality Signal: The warranty is the manufacturer’s vote of confidence. Scrutinize the terms. A robust warranty for a premium bike might be: Lifetime on frame, 10 years on parts (flywheel, crank), 2 years on electronics, 1 year on labor. A budget bike may offer only 90 days on parts. A strong warranty often correlates with better customer service and parts availability. This is a critical factor for protecting an investment that can exceed $2,000.
Serviceability: Consider how the bike will be maintained. Are replacement parts (seats, pedals, brake pads, belts) readily available for purchase? Does the manufacturer have a network of service technicians, or are you responsible for assembly and repairs? User-serviceable designs are a major advantage for home users.
Integrate Space, Budget, and Final Logistics
The perfect bike must also fit the reality of your home and finances.
Measuring Your Space: Do not just measure the floor footprint (Length x Width). Account for the “envelope of use.” Add at least 2 feet behind the bike for safe dismounting, 1-2 feet on each side for arm movement, and consider ceiling height—especially for tall riders on an indoor cycle. Ensure there is adequate ventilation and access to a power outlet if needed. For detailed planning strategies, the foundational principles in our Home Cardio Gym Setup are essential.
Budgeting Realistically: Establish a total budget that includes hidden costs.
Entry-Level ($300 – $700): Basic upright and some recumbent bikes. Manual resistance, basic consoles, lighter construction. Suitable for light, occasional use.
Mid-Range ($700 – $1,800): The sweet spot for most home users. Includes quality uprights, recumbents, and entry-level indoor cycles with magnetic resistance, good adjustability, better warranties, and some interactive features.
* High-End ($1,800 – $4,000+): Commercial-grade indoor cycles, high-tech smart bikes with integrated subscriptions, and premium recumbents. Feature top-tier construction, immersive technology, and extensive programming.
Remember to budget for: Delivery/assembly fees (can be $150+), a quality mat to protect your floor ($40-$80), cycling shoes if needed ($80-$150), and any monthly subscription fees.
Delivery and Assembly: These are substantial machines. “White Glove” delivery and assembly is worth the cost for most people, ensuring the bike is built correctly and placed without damaging your home. If you self-assemble, allocate several hours and ensure you have a helper due to the weight of the flywheel assembly.
The Test Ride Imperative: If possible, try before you buy. Visit fitness equipment retailers, big-box stores, or even local gyms. Sit on the bike. Adjust the seat and handlebars. Pedal at different resistances. Does it feel solid? Is the adjustment range sufficient for your body? Is the seat tolerable? This hands-on experience is invaluable and can instantly rule in or out a model you were considering online.
Making Your Final Decision: A Step-by-Step Checklist
Use this actionable checklist to systematically evaluate any stationary bike model.
1. Confirm Primary Use: Does this bike type (Upright/Recumbent/Indoor Cycle) match my main fitness goal?
2. Verify Physical Fit: Does the seat adjust vertically AND horizontally? Do the handlebars adjust? Is the user weight capacity sufficient?
3. Evaluate the Core Mechanics: Is the resistance type (magnetic/friction) appropriate for my desired feel and maintenance tolerance? Is the flywheel weight conducive to a smooth stroke?
4. Audit Features & Tech: Does the console provide my required metrics? Do I want/need a subscription ecosystem, or do I prefer a BYOD approach?
5. Inspect Build Quality: Does the bike feel rock-solid? What is the total unit weight? What is the warranty on the frame, parts, and labor?
6. Finalize Logistics: Does it physically fit in my designated space, with clearance? Does the total cost (bike + delivery + accessories + subscriptions) fit my budget?
Following this framework moves you from overwhelm to confidence. You are not just buying a piece of exercise equipment; you are procuring a tool for achieving specific health outcomes. The right stationary bike removes friction from your routine, making consistency effortless. It becomes a seamless part of your lifestyle, delivering returns on your investment for years. For those still deciding between major cardio modalities, a detailed comparison in Stationary Bike vs. Elliptical: Which is Better for Your Home Gym? can provide further clarity.
Frequently Asked Questions (FAQ)
What is the most important feature to look for in a stationary bike?
The most critical feature is a combination of seat and handlebar adjustability that fits your body perfectly. A bike that causes discomfort due to poor fit will not be used, regardless of its other features. Proper biomechanical alignment prevents injury and makes exercise sustainable.
Are more expensive stationary bikes worth the cost?
Higher cost typically buys greater durability, stability, and a smoother, quieter ride via superior resistance systems and heavier construction. For users planning frequent, intense workouts (4+ times per week), the investment in a mid-range or high-end bike is justified by its longevity and performance. Casual users may find a budget model sufficient.
Can I lose belly fat using a stationary bike?
A stationary bike is an effective tool for burning calories and creating the overall calorie deficit required for fat loss, which includes abdominal fat. Consistent cardio exercise, especially when combined with high-intensity intervals and strength training, reduces overall body fat percentage. Spot reduction is not possible; fat loss occurs systematically across the body.
How often should I service or maintain my home stationary bike?
Maintenance is minimal for magnetic resistance/belt drive bikes: primarily wiping down sweat and checking bolt tightness every few months. Friction resistance bikes require periodic inspection and replacement of the brake pad. All bikes benefit from a yearly check of pedal and seat fastener tightness. Always refer to your owner’s manual for specific lubrication points and schedules.
Is a stationary bike or treadmill better for knee pain?
For existing knee pain, a stationary bike (particularly a recumbent) is almost always the better recommendation. It provides cardiovascular exercise with minimal impact and compressive force on the knee joints. The motion can help maintain range of motion and strength without exacerbating pain. Always consult a physician or physical therapist for personalized medical advice.
What is a good workout duration on a stationary bike for beginners?
A beginner should aim for 15-25 minutes of moderate-intensity cycling, 3-4 times per week. Focus on maintaining a consistent pace where you can speak in short sentences. Gradually increase duration by 5 minutes per week as your fitness improves. Consistency is far more important than initial duration or intensity.
References
– American Council on Exercise: Upright vs. Recumbent Cycling
– Consumer Reports: Exercise Bike Buying Guide
– Mayo Clinic: Exercise for weight loss: Calories burned in 1 hour
– National Academy of Sports Medicine: The Benefits of Indoor Cycling
– The American Heart Association: Recommendations for Physical Activity in Adults