
How to Maintain Your Home Treadmill or Exercise Bike: A Simple Guide
The Essential Guide to Home Treadmill Maintenance: Protect Your Investment and Ensure Safety
Your home treadmill represents a significant financial commitment and a cornerstone of your personal fitness. Without proper care, this complex machine can quickly degrade, leading to poor performance, costly repairs, or even safety hazards. The core of effective treadmill maintenance is a consistent regimen of cleaning, belt lubrication, and mechanical inspection. By dedicating just 15 minutes per week and 30 minutes per month to these tasks, you can extend your treadmill’s lifespan by years, ensure every workout is smooth and quiet, and prevent the majority of common breakdowns. This guide provides the proven, actionable steps that manufacturers recommend but owners often overlook.
Neglecting maintenance does more than cause annoying squeaks. A dry belt increases motor strain, leading to premature failure of the most expensive component. Dust and debris act as abrasives, wearing down the deck and belt surface. Loose bolts can cause alignment shifts and unstable movement. These issues compound over time, transforming a reliable fitness tool into a frustrating piece of furniture. The process is not technically complex, but it requires regularity and the right materials. We will detail the exact tools you need, the frequency for each task, and the clear warning signs that indicate a problem requiring immediate attention.
This guide serves as the critical follow-up to selecting your equipment. After using our comprehensive Cardio Equipment Guide: Choosing the Best Machines for Home & Gym to make your purchase, implementing this maintenance protocol is how you protect that decision long-term.
Why Consistent Treadmill Maintenance is Non-Negotiable
A treadmill is a system of interdependent mechanical and electrical parts working under substantial load. The motor, drive belt, running deck, and walking belt all experience friction, heat, and vibration during every use. Maintenance directly counteracts the wear caused by these forces. The primary benefits are longevity, performance, and safety.
Longevity is measured in both years of service and total hours of use. A well-maintained motor and drive system can operate for thousands of hours beyond the lifespan of a neglected one. Performance refers to the consistency of your workout experience. A properly lubricated belt and aligned deck provide a consistent, quiet, and fluid running surface. Safety is paramount. Loose hardware, a fraying belt, or an electrically compromised console can pose real risks to the user.
From a financial perspective, the cost of prevention is minimal. A bottle of manufacturer-approved lubricant costs between $15 and $30 and may last over a year. Compare this to a $300+ motor replacement or a $200 deck and belt replacement. What’s more, most warranties explicitly require the owner to perform routine lubrication and cleaning to keep the coverage valid. Failing to do so can void your warranty, leaving you fully responsible for any repair costs.
Your Essential Treadmill Maintenance Toolkit
You do not need advanced mechanical skills, but you do need the correct tools and supplies. Using improper products, like household oils or silicone spray, can damage the belt material and deck coating. Assemble these items before you begin.
Cleaning Supplies:
Microfiber Cloths: These are lint-free and effective for dusting and applying cleaning solutions without scratching surfaces.
Mild, Non-Abrasive Cleaner: A solution of mild dish soap and water is ideal for the console and painted surfaces. For disinfecting, use a cleaner specifically labeled as safe for exercise equipment. Avoid ammonia-based or abrasive cleaners.
Soft-Bristled Brush or Vacuum Attachment: For removing dust, dirt, and debris from around the motor compartment, belt edges, and floor area.
Lubrication & Mechanical Supplies:
Manufacturer-Recommended Treadmill Lubricant: This is critical. Lubricants are formulated for specific deck materials (e.g., wax-based for some, silicone-based for others). Using the wrong type can cause slippage or degradation. Check your manual.
Treadmill Lubrication Kit (Optional): Many brands sell kits with a special applicator bottle and nozzle to simplify the process.
Allen Wrench Set (Hex Keys): Standard in both metric and imperial sizes for checking and tightening frame and roller bolts.
Adjustable Wrench or Socket Set: For adjusting the belt tension bolts at the rear of the treadmill.
Level: A small bubble level to ensure your treadmill is positioned on an even floor, which affects belt alignment and wear.
Safety Item:
Treadmill Safety Key: Always remove and store this during maintenance to prevent any accidental startup.
Having these items dedicated to your treadmill care makes the routine faster and more likely to be completed.
The Weekly Cleaning Protocol: A 15-Minute Routine
Weekly cleaning prevents the buildup of sweat, dust, and skin cells that can corrode metal, degrade plastic, and clog motor vents. Perform this after your last workout of the week.
1. Unplug the Treadmill: Always start by disconnecting power from the wall outlet. This is a fundamental safety step.
2. Wipe Down the Console and Handrails: Dampen a microfiber cloth with your mild soap solution or equipment-safe disinfectant. Wring it out thoroughly. Wipe all console surfaces, display screens, heart rate sensors, and handrails. Never spray liquid directly onto the console. Moisture can seep into buttons and electronics.
3. Clean the Walking Belt and Deck Area: While still unplugged, lift the edges of the walking belt and wipe the exposed deck area near the sides to remove surface dust. Wipe the top surface of the walking belt with the damp cloth. For stubborn marks, a slightly stronger cleaner approved for rubber can be used sparingly.
4. Vacuum Around and Underneath: Use a soft brush attachment to vacuum the floor around the treadmill, particularly at the rear near the motor cover. Dust bunnies and pet hair can be sucked into the motor compartment, causing overheating.
5. Inspect for Obvious Issues: As you clean, do a visual check. Look for new cracks in the belt, unusual wear patterns, or any loose plastic covers.
This simple routine maintains hygiene, protects finishes, and gives you a regular opportunity to spot early signs of trouble.
The Monthly Lubrication and Mechanical Check: A 30-Minute Investment
This monthly procedure addresses the core mechanical needs of your treadmill. It preserves the belt and deck, ensures proper alignment, and keeps the machine running quietly. Set a calendar reminder for the same day each month.
Part A: Lubricating the Walking Belt
Lubrication reduces friction between the walking belt and the deck. Excessive friction causes the motor to work harder, increases belt wear, and creates a sticky or sluggish feeling.
1. Locate the Lubrication Points: Consult your manual. Most treadmills are lubricated by lifting the belt at the center and applying lubricant directly to the deck. Some models have specific ports near the side rails.
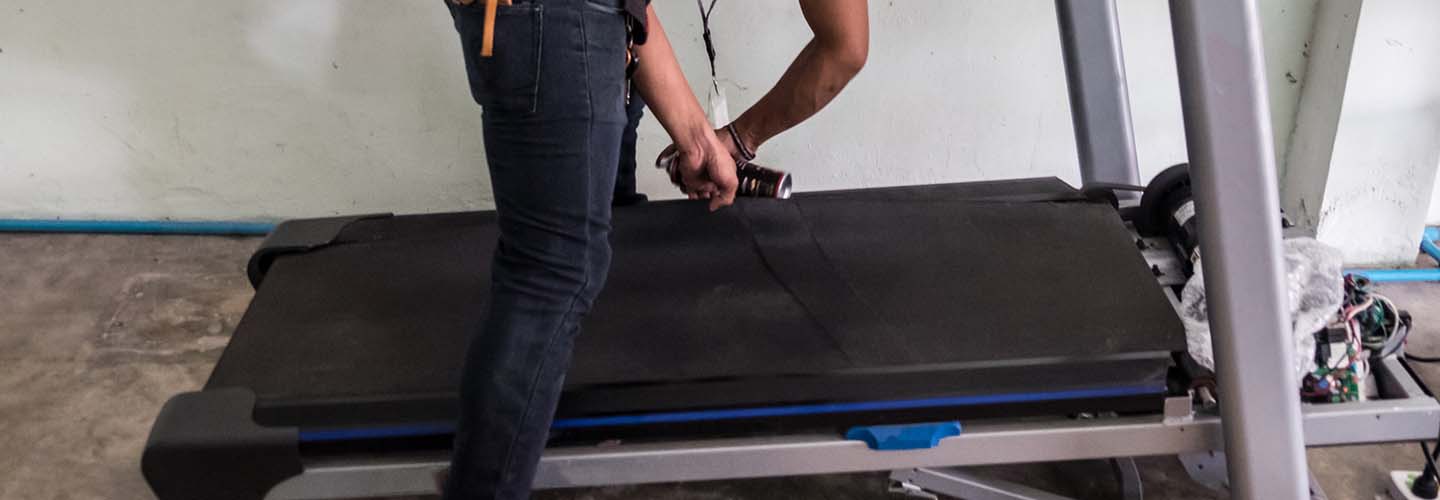
2. Apply the Lubricant: Unplug the treadmill. Use the recommended lubricant and applicator. If applying under the belt, lift it in the center and apply a thin, zigzagging line of lubricant down the center of the deck, from the rear roller to the front roller. Avoid over-lubricating; two to three ounces is typically sufficient. Do not apply lubricant to the top of the belt or the rollers.
3. Distribute the Lubricant: Plug the treadmill back in. Place the safety key in the console. Stand on the side rails, start the belt at a slow speed (1-2 mph), and let it run for 2-3 minutes. This evenly distributes the lubricant across the deck.
Part B: Checking Belt Tension and Alignment
A belt that is too tight strains the motor and rollers. A belt that is too loose will slip underfoot. Misalignment causes the belt to drift to one side and wear unevenly.
1. Test Belt Tension: With the treadmill off, try to lift the walking belt in the center. You should be able to lift it about 2-3 inches off the deck. If you can lift it higher, it is too loose. If you can barely lift it, it is too tight.
2. Check Belt Alignment: Start the treadmill at a slow speed (1-2 mph) while standing on the side rails. Observe the belt. It should run centered over the deck. If it drifts consistently to one side, it needs alignment.
3. Adjust if Necessary:
For Tension: Locate the two adjustment bolts at the rear end of the treadmill (sometimes under plastic caps). Using your wrench, turn both bolts a quarter-turn clockwise to tighten or counter-clockwise to loosen. Always adjust both sides equally. Re-test the tension.
For Alignment: If the belt drifts to the right, slightly tighten the left rear adjustment bolt (clockwise) OR slightly loosen the right rear bolt (counter-clockwise). Make adjustments in quarter-turn increments only. Run the belt and observe. Repeat until the belt runs centered.
Part C: Tightening Hardware and Inspection
Vibration from use can loosen bolts over time.
1. Tighten Frame Bolts: Use your Allen wrenches to check the bolts on handrails, the console uprights, and the base frame. Do not overtighten; just ensure they are snug.
2. Visual Inspection: Look at the power cord for frays. Check the underside of the walking belt for excessive wear or cracking. Inspect the deck for any visible grooves or burn marks from friction.
Troubleshooting Common Treadmill Problems
Even with maintenance, issues can arise. Here is how to diagnose and address the most frequent problems.
Problem: The belt slips or hesitates when I step on it.
Likely Cause: Insufficient lubrication or a loose drive belt (internal).
Solution: First, complete the lubrication procedure. If slipping persists, the walking belt may be too loose. Perform the belt tension test and adjustment. If the problem continues, the internal drive belt may need tightening or replacement—consult a technician.
Problem: The treadmill belt is drifting to one side.
Likely Cause: The walking belt is misaligned.
Solution: Perform the belt alignment procedure detailed in the monthly check. Often, a single adjustment will correct the drift. Ensure the treadmill is level from side to side.
Problem: There is a burning smell or the motor seems excessively hot.
Likely Cause: Excessive friction from a dry belt/deck, a slipping drive belt, or a clogged motor compartment causing overheating.
Solution: Immediately stop using the treadmill. Unplug it. Check that the walking belt is properly lubricated and tensioned. Vacuum thoroughly around the motor vents. If the smell persists, a component may be failing; contact customer service.
Problem: The console displays an error code (e.g., E1, E6) or will not start.
Likely Cause: An electronic fault, often related to safety key detection, speed sensor issues, or motor controller problems.
Solution: Note the exact error code. Unplug the treadmill for 60 seconds, then plug it back in—a simple reset. Ensure the safety key is fully inserted and the magnetic clip is clean. If the error returns, your manual will have a code list; this typically indicates a need for professional service.
Problem: The machine is noisier than usual (squeaking, grinding, thumping).
Likely Cause: Squeaking often indicates need for lubrication. Grinding may point to a worn drive belt or motor bearing. A rhythmic thump suggests a damaged roller or debris stuck under the belt.
* Solution: For squeaks, lubricate first. For grinding or thumping, inspect under the belt for obstructions. If the noise source is not obvious, a technical inspection is warranted.
Seasonal and Long-Term Maintenance Considerations
Beyond weekly and monthly tasks, consider these less frequent but important actions.
Every 6 Months: Perform a more thorough cleaning. Pull the treadmill away from the wall to vacuum behind it completely. If your model has a removable motor hood, carefully remove it (per manual instructions) and vacuum any accumulated dust inside. This is critical for preventing motor overheating.
Annual Check-Up: Once a year, consider a comprehensive review. This is a good time to re-check the calibration of speed and incline if your model allows it. Examine the walking belt and deck for wear. Most belts have a wear indicator line; if this line is no longer visible, plan for a replacement. Similarly, if you can feel a significant groove in the deck by running your hand under the belt, the deck may need to be flipped or replaced.
When to Seek Professional Service: For electrical issues beyond a reset, for internal drive belt or motor repairs, or for any problem you do not feel confident diagnosing, contact an authorized service technician. Attempting complex internal repairs can void warranties and create safety hazards.
Integrating Maintenance into Your Fitness Ecosystem
Your treadmill is one component of a home fitness strategy. Proper care ensures it remains a reliable tool for achieving goals, whether for weight loss, cardiovascular health, or training for an event. For instance, a well-maintained, quiet treadmill is ideal for following the structured programs outlined in our guide on HIIT & Aerobic Training: A Complete Guide to High-Intensity and Traditional Workouts.
What’s more, understanding how to care for your equipment is part of savvy home gym ownership. It complements the planning principles discussed in our Home Cardio Gym Setup: Budget, Space, and Equipment Planning Guide, protecting the investment you carefully planned.
If you are also maintaining other equipment, note that procedures differ. The care needed for a stationary bike, for example, focuses more on drive chain tension and brake pad inspection. You can explore those specifics in our dedicated How to Choose a Stationary Bike: A Buyer's Guide for Home Gyms, which includes maintenance considerations.
Conclusion: Maintenance is the Foundation of Performance
A home treadmill is a powerful instrument for health, but its performance and longevity are directly tied to your stewardship. The regimen outlined here—weekly cleaning, monthly lubrication and mechanical checks, and seasonal deep cleaning—is not merely a suggestion. It is the operational requirement for a machine enduring repeated, high-force use. This proactive approach prevents nearly 80% of common treadmill failures, safeguards your financial investment, and most importantly, ensures a safe environment for every workout.
Do not allow neglect to shorten the life of your equipment. Begin your maintenance schedule this week. Gather your toolkit, reference your owner’s manual for specific lubricant requirements, and commit to the simple cycles of care. Your treadmill will respond with years of quiet, reliable service, faithfully supporting your fitness journey from the first step to the ten-thousandth mile.
Frequently Asked Questions (FAQ)
How often should I really lubricate my treadmill?
Lubrication frequency depends on use. A general rule is every 130 miles or 3 months, whichever comes first. For high-use households (over 10 hours weekly), lubricate monthly. Always check your owner’s manual for the manufacturer’s specific interval and lubricant type, as this is often a warranty requirement.
Can I use WD-40 or household silicone spray on my treadmill?
No, you must not use WD-40 or generic silicone spray. WD-40 is a penetrant and degreaser, not a lubricant; it will damage the belt material. Household sprays contain additives that can degrade the deck. Only use lubricant specified for treadmills by your machine’s manufacturer to ensure compatibility and safety.
What does it mean if my treadmill belt has a black residue on the edges?
Black residue is typically carbon dust from excessive friction between the belt and the deck. This indicates the belt is likely running dry and needs immediate lubrication. It can also signal misalignment, causing the belt edge to rub against the frame. Address lubrication and alignment as outlined in the monthly check.
Is it worth paying for a professional treadmill service?
For complex electrical issues, motor problems, or deck replacement, a professional service is advisable and often necessary. For routine lubrication, belt tensioning, and cleaning, most owners can perform these tasks themselves with the proper guidance. Professional annual check-ups can be valuable for high-use commercial-grade machines in home settings.
How do I know when it’s time to replace the walking belt or deck?
Replace the walking belt if you see cracks, fraying edges, or if the central wear indicator line has worn away. The deck needs replacement if you can feel a deep, noticeable groove when running your hand under the belt, or if there is visible burning or warping. A worn deck dramatically increases motor strain.
References
– Treadmill Maintenance Guide
– How to Lubricate a Treadmill
– Common Treadmill Problems and Solutions
– Treadmill Care and Cleaning